MOUNT KILIMANJARO

Mount Kilimanjaro, located in Tanzania, East Africa, is the highest mountain in Africa, reaching an impressive elevation of 19,340 feet (5,895 meters). Renowned as the largest free-standing mountain worldwide, it stands proudly among the seven summits. Its majestic, snow-capped peak dominates the breathtaking landscape, commanding attention from the surrounding savannahs. Situated within the Kilimanjaro National Park, this natural wonderland boasts a remarkable array of unique flora and fauna that add to its allure. Despite being a dormant volcano, Kilimanjaro continues to captivate climbers and outdoor enthusiasts, serving as a prime source of inspiration. Its challenging ascent and stunning vistas attract adventurers from every corner of the globe, making it an iconic destination that offers an unforgettable experience.

Check our Ironman & Ironwomen and Hybrid Packages

THE MAJESTIC KILIMANJARO.

The name "Kilimanjaro" has several potential origins. The Chaga people, who traditionally lived near the mountain, had no specific name for it, only referring to its two peaks as Kipoo (Kibo) and Mawenzi. Some believe that the name may have been derived from the Chaga phrase "kilema kyaro," meaning "difficult journey," possibly altered by outsiders. Another theory suggests that travelers may have asked the Maasai people living on the plains for the mountain's name, to which they may have referred to it as the source of water using the word "ngare," which gradually evolved into "njaro." With more than 120 tribes in Tanzania, the true origin of the name "Kilimanjaro" remains a subject of debate and speculation.

Mount Kilimanjaro is a stunning stratovolcano with three main volcanic cones, including Kibo, Mawenzi, and Shira. The highest summit, Uhuru Peak, sits on Kibo's crater rim, reaching an impressive height of 19,340 feet.

This giant volcano began forming a million years ago and is still considered dormant, with the potential for future eruptions. However, it has not experienced a major eruption in 360,000 years, with the most recent activity recorded 200 years ago.

Kilimanjaro is also home to 2.2 square kilometers of glacial ice, which is rapidly declining due to climate change. Since 1912, the glaciers have reduced by 82% and by 33% since 1989. If this trend continues, the mountain could be ice-free within 20 years, posing significant challenges for local drinking water and crop irrigation.

Kilimanjaro Routes

Hiking Mount Kilimanjaro offers seven main routes, each leading to the summit, Uhuru Peak. These routes include Marangu, Machame, Lemosho, Shira, Rongai, Northern Circuit, and Umbwe.

The duration of the hike varies from five to nine days, allowing for acclimatization to the altitude and increasing the chances of a successful summit.

The routes start from either the northern or southern side of the mountain, offering different experiences and views along the way. With our proper preparation and a our professional guides, hiking Kilimanjaro can be a little challenging but rewarding experience.

Who Can Climb Kilimanjaro?

If you've ever dreamed of climbing Mount Kilimanjaro, our guides are standing by to help you reach the summit. We know that getting to the top of Kilimanjaro is an extraordinary feat, and we're here to help you achieve it. It doesn't matter if you're young or old, whether this is your first mountain climb or your fiftieth, we'll make sure you have the experience of a lifetime. As long as you have the will and determination to keep going, we'll help you get to the top. Our expert team can help anyone who is determined enough to reach the top of Mount Kilimanjaro, regardless of age. Our youngest climber is just 10 years old, and we’ve had clients in their 60s and 70s successfully complete the ascent.

Best Kilimanjaro Route

The Northern Circuit route and Machame route are considered the highest success rate and overall best routes to climb Kilimanjaro. Over 7 or 8 days, these routes offer excellent acclimatization and an easier summit night, making them the top choices for climbers who prioritize reaching the summit. For most climbers, reaching the top is the most important thing, and that's why these routes are considered the overall winners as the best routes to climb Kilimanjaro.

Most scenic route to climb Kilimanjaro

The Lemosho route, coming from the west, is widely considered the most scenic way to climb Kilimanjaro. With breathtaking views in every direction, this route offers spectacular vistas that are truly unmatched. The beauty of the landscape surrounding the trekking path is sure to leave any adventurer in awe, making the journey to the top of Kilimanjaro an unforgettable experience. From lush forests to stunning panoramas, the Lemosho route provides a diverse and captivating environment for climbers to enjoy along the way. So, for those seeking not only a thrilling adventure but also the opportunity to take in some of the most picturesque scenery imaginable, the decision to tackle Kilimanjaro via the Lemosho route is an easy one.

Quietest route to climb Kilimanjaro

The Rongai route is perfect for those seeking a quiet and peaceful climb up Kilimanjaro. If you want to avoid the crowds and experience a more secluded and serene journey, this is the route for you. This less-traveled path offers a unique and tranquil experience, allowing you to fully immerse yourself in the stunning surroundings without the distraction of large groups of climbers. With its breathtaking views and peaceful atmosphere, the Rongai route is the ideal choice for those looking for a more intimate and personal adventure to the top of Kilimanjaro. So if you prioritize a quiet and undisturbed climb, look no further than the Rongai route for your Kilimanjaro expedition.

What is the best time to climb Kilimanjaro?

April-May

The “big” rainy season starts at the end of March and continues until the middle of May. April marks the beginning of the coldest time of the year in Tanzania. These months have significantly less climbers than the rest of the year, but there is a high chance of hiking in the rain at this time of the year.

June-July

The frequency of rain gradually decreases. The weather on Kilimanjaro is fairly dry and clear in these months, but nights are still cold. June is usually quiet, sunny, and, in our opinion, much underrated in terms of climbing. It is an excellent idea to choose June for your adventure because of great weather and routes that are almost private to your climbing party. The number of climbers increases as the year progresses. Starting from July the majority of the routes will be quite busy.

August to September

Are the peak climbing season on Kilimanjaro. The weather is particularly good for climbing: the days are clear and somewhat warmer than in June/July. At the same time, it may be cloudy in the forest/moorland zone, as well as it may be rainy on the southern routes (Machame and Umbwe). However, once you leave the rain forest behind, it will be sunny.

October

is another unfairly ignored season: nice weather conditions last into mid-October and the number of climbers drops dramatically, giving you a good chance to enjoy Kilimanjaro treks almost alone. At the end of October, the weather becomes more changeable. As long as you are equipped to withstand the occasional rain shower, this should not present any major challenges.

November

is the “small” rainy season. The rainy weather may last into mid-December. The temperatures will have dropped and mist covers the Mountain, making your climb slightly tricky and risky, yet more challenging and exciting. November might not be the best pick in terms of weather, but gives a great opportunity to enjoy the breathtaking views of misty-covered Mount Kilimanjaro with its snow-capped peak and to take some terrific pictures.

December - January

- Christmas and New Years are the second busiest climbing season on Kilimanjaro. The traffic is extremely high, although there is a good chance of rain and thick clouds at the lower altitudes of Kilimanjaro.

Mid-January to mid-March

Is very popular among climbers. The weather is perfectly balanced: it is neither too cold, nor too wet. The days are generally dry, though occasional rains may happen. The possibility of rain increases in the second half of March because the season of the “big rains” is approaching.

When is the best time to Climb Mount Kilimanjaro?

When deciding on the best time to climb Mount Kilimanjaro, it's important to take into account a variety of factors such as temperature, views, traffic on the trek, difficulty level, and safety. However, the most important factor that influences all of these is the weather. Mount Kilimanjaro is situated in an equatorial climate zone, which means it only experiences wet and dry seasons. The wet seasons occur in April-May and November, and, like other tropical countries, predicting the exact start and end of the rain is almost impossible. The rest of the months are considered the "dry season", offering mostly sunny days, but with no guarantee of clear skies. This information is crucial for planning a safe and enjoyable climb to the top of Africa's highest peak.

Kilimanjaro Tempereture

The rainforest zone, located at an altitude of 800m to 3,000m, is a warm and humid environment. It is densely covered with lush green vegetation, and temperatures here range from 12-15°C (50-60°F) on average, but can reach 20-25°C (70-80°F) during the daytime at 2,900m. This is where you will begin your climb, and you will spend the first one or two days in this zone, depending on the specific route you are taking. The thick vegetation and warm, moist air make for a unique and vibrant ecosystem that is sure to provide an unforgettable experience as you begin your ascent.

At the low alpine zone, which ranges from 3,000m to 4,200m, you will encounter a semi-arid environment with sparse vegetation as you ascend. Depending on the route, you may spend one or two days in this area with average temperatures ranging from 5-10°C (40-50°F), reaching 15-20°C (59-68°F) during the daytime at 3,600m. The higher you climb, the more you will notice the scarcity of vegetation.

At the high alpine zone, at an altitude of 4,200m-5,000m, the landscape resembles a desert. The fourth and fifth days of the mountaineering expedition will be spent in this area, preparing for the final push to the summit. Despite the high altitude, temperatures here average around freezing (0°C/32°F) at 5,000m. However, during the daytime, when the sun is out, it can still feel warm and comfortable. The team will need to acclimatize to the thin air and harsh conditions before attempting the summit. The barren and stark beauty of the high alpine zone will provide a unique and challenging experience for the climbers.

At the summit of Mount Kilimanjaro, temperatures can drop as low as -6°C / 21°F, and even lower to -20°C / -4°F during the midnight trek to reach Uhuru Peak. The harsh gusts of wind can make it feel like -30°C / -22°F, but enduring the cold is totally worth it for the breathtaking view of the rising sun at the top. The trek at night may be challenging, but the sight of the sunrise from the highest peak in Africa is one of the most stunning views you will ever witness.

How Long Does It Take To Climb Mountain Kilimanjaro

Climbing Mount Kilimanjaro is a challenging feat, and about 25% of beginner climbers fail to reach the summit. One of the main reasons for this is that they often choose a shorter itinerary, which does not allow them to acclimatize properly. The duration of the climb can range from five to nine days, with longer expeditions including crater camping extending up to ten days. For beginners, it is recommended to choose a seven-day route, while shorter variations lasting 5 or 6 days are better suited for experienced hikers who have already acclimatized. It is important to carefully consider the itinerary to ensure the best chance of reaching the summit and having a safe and enjoyable experience.

What's the shortest time to climb Kilimanjaro?

The minimum duration for climbing Mount Kilimanjaro is set by the Kilimanjaro National Park Authority, currently at five days for the Marangu and Rongai routes, and six days for all other routes. This minimum duration is mainly for park fee purposes, as the fees make up a significant portion of the total package cost, such as $800 per person for a six-day Marangu route. Even if a climber finishes the climb in fewer days due to excellent fitness and acclimatization, these fees remain unchanged. The durations set by the park authority take into consideration the distance an average hiker can comfortably cover between two camps daily while ensuring reasonable acclimatization. So while it is not impossible to climb Kilimanjaro in a shorter time, it is important to adhere to the minimum duration for park fee purposes.

Acclimatization

Acclimatization is the process of allowing the body to adjust to high altitudes in order to avoid altitude sickness. When at the summit of Kilimanjaro, the decreased atmospheric pressure can make it feel like you are breathing through a narrow straw, leading to a struggle to take in enough oxygen. If a climber were to be transported directly to the top of Kilimanjaro, they would likely experience acute mountain sickness within a few hours, which can progress to potentially fatal conditions like cerebral or pulmonary edema. It is important to allow the body time to acclimatize to the decreased oxygen levels in order to avoid these serious health risks, and have a safe and enjoyable experience

To successfully climb Mount Kilimanjaro, it is crucial to allow your body to acclimatize to the high altitude. Most hikers find that a 7-8 day itinerary is the ideal timeframe to avoid altitude sickness and ensure a smooth ascent. During this period, the body undergoes various physiological changes to adapt to the decreased oxygen levels. Breathing rates increase, even at rest, to take in more oxygen, while the heart rate rises to pump oxygen-rich blood throughout the body. The production of red blood cells also increases, enhancing the body's capacity to transport oxygen. Additionally, blood vessels in the brain dilate to improve blood flow and oxygen delivery. These adaptations enable the body to function more efficiently in environments with lower atmospheric pressure, such as the high altitudes experienced during a Mount Kilimanjaro hike.

Kilimanjaro Training Program

You might be asking yourself, "Don't you just train for hiking by going on a few hikes?" That's definitely something you should do, but if you're just getting into hiking or you aspire to do longer hikes to loftier places, then doing some preseason training can be a big help.

This workout plan is designed to target areas that power you up the trail mile after mile: It increases strength in your core and major leg muscles, and it helps build endurance in those same muscle groups.

Here's a quick, general overview of how to train for hiking:

Increase strength in major muscles that hikers rely upon. Stronger legs and core muscles will better support the load in your pack and help you hike harder, longer.

Build endurance in those same muscle groups, as well as the shoulders and lower back, because hiking can be an all-day activity.

Improve your balance so you have a more stable base that will allow you to take uneven terrain in stride.

Don't forget your cardio. Complement this exercise plan with activities like trail running, mountain biking or another aerobic exercise that you enjoy.

Before beginning any training plan, check in with your doctor or certified training professional.

Training Schedule for Hiking

Start training 8 weeks before your first long hike. A good mix of workout types for each week involves the following:

  • 2 nonconsecutive days of strength training (exercises in this article)

  • 2 nonconsecutive rest days; take more any time you feel your body needs it

  • 3 nonconsecutive cardio sessions weekly until the final two weeks before a major hike

  • Two weeks before your trip: Change your cardio days to long day hikes (60+ minutes each) with a pack that's close to the weight you'll be carrying on your trip. Also add a fourth day-hike training session to one of your strength-training days.

  • One or two days prior to your trip: Ease up on all training.

Training Exercises for Hiking

  • Keep the following in mind as you train:

  • Make the exercises fit your body, not the other way around.

  • If something hurts, modify the exercise or skip it; and take extra rest days if you feel the need

  • Move at your own pace, going slowly at first. Increase the repetitions or add more resistance or weight as your training progresses.

Warm up: Get yourself warmed up by doing a brisk 5- to 10-minute walk. Then follow the guidelines below as you progress through the exercises in this article:

  • Inhale during initial exertion, then exhale as you return to the starting position; during faster exercises, simply make sure you breathe regularly.

  • Rest for 30 to 45 seconds at the end of each exercise (unless otherwise noted).

  • Do each of the exercises below one time in succession, then rest for two minutes and repeat another set of the exercises (if you have time to fit in a third set of exercises, that's even better).

Jump Squats

Squats find their way into many exercise plans because they provide an excellent all-around workout for all of the muscles in the lower body and legs—your body's hiking engine. Adding a jump helps further develop power in the lower legs.

Props: None

  • Start with your feet shoulder-width apart and then squat down until your thighs are at least parallel with the ground.

  • Keep your chest up, your feet flat and your knees over your toes.

  • As you come up from the squat, push through heels and explode up and jump a few inches off the ground.

  • Land softly and quietly, and immediately go into another squat.

  • Do 15-20 times.

Hip Roll Exercise

Most of your daypack weight rides on your hips. This exercise works the glutes and other muscles that support the hips to improve their stability and endurance.

Props: None

  1. Stand on your left leg.

  2. Lean your body forward at your hips, keeping back straight and lift your right leg back behind you, slightly off the ground.

  3. Rotate (roll) your hip away from your standing foot.

  4. Keep your body in a straight plane as you roll your hips back.

  5. Repeat 10-15 times on each side.

Tips and modifications: If it's too hard to balance, hold onto the back of a chair or keep your toes on the ground.

Step Up Exercise

Hiking with a pack on involves a seemingly endless amount of stepping up and over things. This exercise builds strength and endurance in your glutes and quad muscles so you can handle whatever obstacles you'll encounter along the trail.

Props: A stable surface, about 8 inches off the ground. If you have a training box or an aerobic step at home, you can use that. If not, the bottom step on a flight of stairs can also work.

  1. Start with your left foot on the ground and your right foot on top of the step; your right knee will be bent.

  2. Step up until you are standing with your right leg nearly straight and you are balanced on top of the stop; your left leg should be bent slightly and your left foot poised an inch or so above the step.

  3. Pause in a balanced position, then step down, returning your left leg and right foot to the starting position.

  4. Do this 15 times; then repeat the exercise 15 times on the other side.

Tips and modifications: Adjust the difficulty by finding a higher or lower (stable) surface to step on.

Heel Down Exercise

To get down after you step on top of boulder or a log, you need to be able to lower your body and pack weight under control. That's key to preventing knee injuries and stumbles. This exercise works your glutes and quad muscles so you have the strength and the balance to do that smoothly and efficiently.

Props: A stable surface, about 8 inches off the ground. If you have a training box or an aerobic step at home, you can use that. If not, the bottom step on a flight of stairs can also work.

  1. Start by standing on top of a step, balanced on your right foot with your left foot hovering to the side.

  2. Lift the toes on your left foot up, then bend your right knee as you slowly lower your left leg until your left heel is barely touching the ground or poised just above it.

  3. Power back up with your right leg until you are back to the starting position.

  4. Do this 15 times; then repeat the exercise 15 times on the other side.

Tips and modifications: Adjust the difficulty by finding a higher or lower (stable) surface to step on.

Squat Curl Overhead Press Exercise

This exercise combines a squat to work lower body muscles with quickly lifting a moderate amount of weight to build the strength you'll need as you explore the trails and take your daypack on and off throughout the day.

Props: A pair of lightweight dumbbells

  1. Stand with feet shoulder-width apart, arms at your side, holding a dumbbell in each hand.

  2. Press your hips back and squat down as if you're about to sit on an invisible chair. Try to bring your thighs parallel to the floor.

  3. Power back up to a standing position, using your upward momentum to assist you as you curl up and then press the dumbbells overhead with palms facing each other the entire time.

  4. Return to starting position and repeat 10-15 times.

Tips and modifications: Keep your back and neck in a neutral position; try not to round your shoulders or crane your neck forward throughout this exercise. Also, try not to let your knees go past your toes when you're squatting.

Bridge with Hamstring Curl Exercise

The bridge portion of the exercise engages your core muscles to help improve your balance on the trail. The hamstring curl builds up the glutes and hamstring muscles so they can provide power on uphill sections.

Props: This exercise requires a medium size exercise ball. To check for the correct size, sit on it. If the tops of your legs are parallel to the ground, then it's the correct size. If the tops of your legs slope toward your knees, then the ball is too large. (If the tops of your legs slope slightly up toward your knees, the ball size is still fine.)

  1. Lie on your back with your arms extended down by your sides, with your legs extended and your heels resting atop the exercise ball.

  2. Tighten your glutes and abs as you pull your legs back, rolling the ball toward your butt.

  3. Stop when your knees are bent at slightly more than 90 degrees.

  4. Extend your legs straight again, rolling the ball away from you.

  5. Repeat the sequence 15 times.

Tips and modifications: If you struggle to maintain balance as you roll the ball, place your heels slightly farther apart on the ball and move your arms away from your body; increase difficulty by keeping your heels closer together and by moving your arms closer to your body.

Side Plank with Leg Raise Exercise

Planks are a staple of many exercise routines because they help build key core muscles like the obliques, glutes and leg muscles. This plank variation adds a leg raise to build endurance in the muscles that move and support your hips.

Props: None

  1. Lie on your right side, supported by your elbow under your shoulder; your right forearm should be perpendicular to your body; your left hand should rest on your left hip, with your left elbow pointing up; your legs and feet should be stacked atop one another.

  2. Tighten your core as you raise your hips up into a plank, creating a straight line from your head to feet.

  3. Slowly raise your left leg up and slightly back, keeping it straight as you do so. Keep your hips still.

  4. Lower your leg and raise it a total of 10 times.

  5. Repeat the exercise lying on your left side for 10 more reps.

Tips and modifications: Adjust the difficulty by adjusting how high you raise your top leg each time.

Hip Clock Exercise

Many hikers complain of knee fatigue and soreness. This exercise builds strength in the hips, which helps prevent knee issues by giving you better control over your knees.

Props: None

  1. Stand with your weight balanced on your left leg and that knee slightly bent.

  2. Keep your back straight and weight centered over the standing knee.

  3. Imagine that you're at the center of a clock. Lift and extend your right leg, reaching forward toward 12 o'clock.

  4. Bring your leg back to the center.

  5. Repeat the movements toward the 3, 6, and 9 o'clock positions. As you reach for each position, stay balanced over the standing leg and don't let your hips shift side-to-side.

  6. Switch to the other leg and repeat; do 5 to 8 sets on each leg.

Tips and modifications: Keep your hips level and push into the ground with your standing foot for balance. Make smaller leg movements if you feel off balance.

On the Mountain
  • Choose the longest route possible, for the best acclimatization protocol

  • Take it slow and steady: conserve your energy, there’s no rush

  • Stay hydrated, and eat regularly

  • Use hiking poles to help you balance on uneven terrain

  • Treat ‘hotpots’ on your feet to prevent them from turning into blisters

Learn the Rest-Step

The “rest step” is a hiking technique that has you drop your heel with every step, completely straightening your leg. This puts the weight on your skeleton and gives your muscles a chance to relax for a moment.

And most importantly: tell your Tanzania Pursuit guide immediately if you feel unwell, have a headache, nausea or are suffering any kind of pain.

Mental Stamina

Trekking Kili is a mental challenge and requires perseverance and determination. The long hours of hiking, effects of altitude, and sleeping in a cold tent can all take their toll.

How can you ‘train’ mental stamina?

  • Remembering your “why”. Why did you choose Kilimanjaro? Are you raising money for a charity? Perhaps it’s to push your physical capacity or a lifelong dream. Either way, keep your “why” in mind

  • Mindfulness and meditation. There are plenty of resources explaining the benefits to mind and body of meditation, one of which is improving your mental resolve

  • Hard training: pushing yourself through a previous ‘limit’ can show you just what you’re capable of. Perhaps you’ve achieved a personal best of some sort.

  • Confidence, but not over-confidence. Achieving milestones that you set for yourself can increase your confidence in your ability to handle tough situations. Over-confidence can cause laziness and complacency

  • Draw on your own experiences. Remember some difficult situations you’ve overcome, and remind yourself that you can do this.

  • Be informed: read up as much as you can about the challenge you are undertaking, build up knowledge about the mountain as well as about yourself

  • One step, one breath, one activity, one achievement at a time.

Nutrition

On the mountain, we ensure that you are provided with nutritious and balanced meals that are dense in essential nutrients. Our meals are also tailored to accommodate various dietary requirements. It is crucial for you to adhere to a healthy and well-planned nutrition during your training in order to achieve the best possible results that are in line with your fitness goals.

Summing Up

Climbing Mt. Kilimanjaro is achievable for anyone in good health, with the approval of their doctor. There is no magical formula for training, just hard work and gradual improvement. It's important not to compare yourself to others, as people in less than optimal physical condition have reached the summit while athletes have failed. Altitude affects everyone equally. Focus on being your best self and training to be in peak physical shape. If unsure, seek guidance from a qualified personal trainer or your physician.

COMPLETE KILIMANJARO PACKING LIST

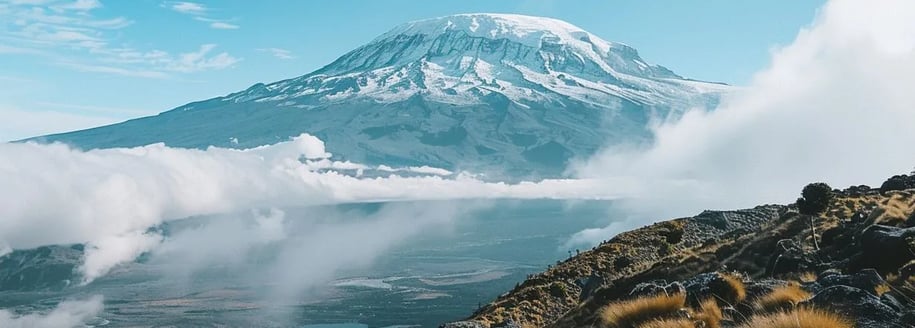
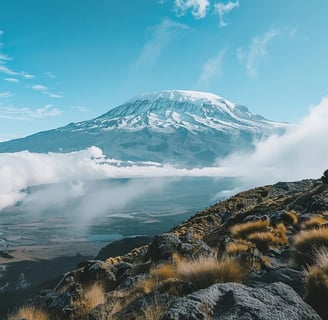
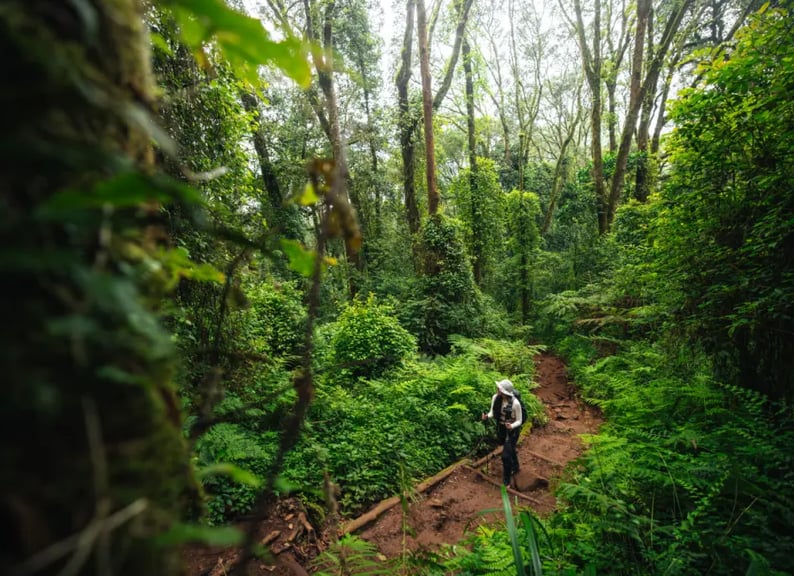
To ensure your safety and comfort during your climb up Mount Kilimanjaro, it is essential to bring the necessary gear and supplies. We have compiled a detailed packing list to assist you in preparing for your ascent. The trek up Kilimanjaro spans five distinct climate zones, ranging from warm and humid forests on the lower slopes to the frigid summit zone with glaciers, ice, and snow. It is crucial to be ready for all types of weather conditions, including sunshine, wind, and rain.

Tanzania Pursuit Adventure, will offer everything you need for a comfortable and enjoyable trekking experience. From tents and cooking facilities to food and other shared items, we have you covered. During the trekking day, you will carry your own daypack while the porters will carry a duffel bag with all your kit.

For those looking for a more challenging experience, we offer the Ironman & Ironwoman packages where you can shoulder all your gear, equipment, and food. Additionally, we also offer hybrid packages that allow you to customize your trip by choosing what is included or not included.

With our comprehensive services and customizable options, we ensure that every trekker has a fulfilling and memorable experience on Kilimanjaro.

When preparing for your Kilimanjaro climb, it is crucial to carefully plan your clothing. It is recommended to pack the following;

  • Top Base Layer

  • Bottom Base Layer

  • 4-5 Pairs of Underwear

  • 3-4 Short Sleeve

  • 1 Insulated Trekking Pants

  • 1-2 Long Sleeve Hiking Shirts

  • 1-2 Pairs of Hiking Trousers

  • 1 Insulated Winter Jacket

  • 1 Polartec Fleece Jacket

  • 1 Hard Shell Jacket

KILIMANJARO EQUIPMENT LIST;
  • Daypack: Your main gear will be carried by a porter (up to 15kg) .You will need to carry your own daypack. 30-40L is sufficient.

  • Waterproof duffle bag: To carry your main gear we recommend using a 80-90L duffle bag. Large rucksacks (>65L) can also work.

  • Sleeping bag: You will need a 4-season or -20 Deg C sleeping bag and compression sack.

  • Trekking poles: Trekking poles can reduce the impact on your joints by up to 20%. They are great for going down Kilimanjaro.

  • Water bladder / bottles: Capacity to carry 3 litres of water. Options: 2 x 1.5 litre wide mouth nalgene bottles or 2 litre platypus + 1 litre water bottle. Note that disposable plastic bottles are not permitted on Kilimanjaro

  • Neck gaiter or scarf: It can get dusty on Kilimanjaro. We recommend bringing a neck gaiter or bandana.

  • Warm beanie style hat: Go for a version of a beanie that is either knitted or fleeced for extra warmth.

  • Sun hat: Preferably go for a hat that is wide-brimmed for protection, and has a neck cover if you aren’t going to be wearing a neck gaiter

  • Headlamp: You will need a headlamp with good light output for any late night toilet journeys, and importantly for summit night.

  • Sunglasses: Choose a pair of high UV protection glasses as sun intensity above 4,000m is very high.

  • Warm gloves or mittens: For the cold nights and for the summit push we recommend heavyweight, insulated, preferably water resistant gloves.

  • Lightweight Gloves: For lower slopes we recommend lightweight, fleece or quick drying fabric gloves.

  • Trekking boots: We recommend using a mid-weight trekking boots with good ankle support.

  • Training shoes: To wear around camp after a day’s trek we recommend bringing a pair of training shoes or sandals

  • Socks: 3-4 pairs of outer socks and 2-3 pairs of liner socks. We also recommend bringing 1 x thick thermal socks for summit night. Merino wool is the best material and Bridgedale or Smartwool make good trekking socks

  • Gaiters: Help keep your trousers clean in wet and muddy or dusty conditions.

  • Thermal base layer: 1 x thermal base layer, ideally made from merino wool

  • Short sleeved shirt: 2 x lightweight, moisture wicking short sleeved shirts.

  • Long sleeve shirt: Go for a light or medium weight, moisture wicking long sleeve shirt (x2

  • Fleece or soft shell jacket: A mid-weight polartec fleece jacket is ideal for Kilimanjaro.

  • Insulated jacket: A good quality and warm down or primaloft jacket is required for the cold nights and summit push.

  • Hard shell outer jacket: A water/windproof hard shell outer jacket to protect you from the elements.

  • Leggings: Thermal or fleece base layer for your legs. Merino wool is preferable.

  • Trekking trousers: Light or medium weight (x1) trekking trousers. Convertible trousers are an option.

  • Hard shell trousers: To protect yourself from the elements you need a good pair of waterproof / windproof hard shell trousers.

  • Plug Adapter: A plug adapter for charging your devices in the hotels before and after the trek. The standard voltage and frequency in Tanzania is 230 V and 50 Hz respectively. The power sockets that are used are of type D / G.

  • Camera and spare batteries: Unless you are a keen photographer we recommend taking a good quality and lightweight point and shoot camera like the Panasonic Lumix.

  • Sun and lip screen: High SPF sunscreen and lip protection balm

  • Toothbrush and toothpaste: Ideally travel size

  • Personal snacks: Boiled sweets, nuts, energy bars and dried fruit are all a good shout. Isotonic drink powder to mix in with your water improves flavour and helps replace electrolytes

  • Ear plugs: For light sleepers. Snoring travels in quiet high altitude camps!

  • Wet wipes and hand sanitizer: Staying clean on Kilimanjaro is a challenge. Wet wipes and hand sanitizer are a huge help

  • Pee bottle (optional): Useful for the ladies, but not a requirement

Booking Your Flight

Flights For Your Mount Kilimanjaro Climb

If you choose to climb Kilimanjaro with us you will be required to purchase your flights yourself. Please send us the details/itinerary in order to confirm precise dates for your climb.

Airports in Kilimanjaro District

The best Airport to arrive at is Kilimanjaro International Airport (JRO). Here is a link to the airport'swebsite: http://www.kilimanjaroairport.co.tz/

    Kilimanjaro International Airport
There is also a secondary airport at Arusha, Arusha Airport (HTAR) (ARK).
  • Major African Airline flying to Arusha:

  • Precision Air

  • Air Tanzania

  • Fly540

Websites:http://airportauthority.com/ARK 

                     Arusha Airport Tanzania

Zanzibar Stopovers

For those adding a Zanzibar stopover to their climb, we recommend the following:

  • International flight into Kilimanjaro International Airport (JRO)

  • Internal flight from Kilimanjaro (or Arusha Airport) to Zanzibar (1 hour & 15mins)

  • Internal flight from Zanzibar to Dar Es Salaam (15 Minutes)

  • International flight from Dar Es Salaam

The reason for this is that if you book return international flights from Kilimanjaro, you will need to travel 1 hour & 15 minutes back from Zanzibar to Kilimanjaro to pick up your international flight, when Dar Es Salaam is also an international airport and only 15 mins (internal flight) from Zanzibar. The daily return KLM flight from Kilimanjaro stops at Dar es salaam before continuing on to Amsterdam. For those individuals adding a Uganda or Kenya safaris extension,

We recommend a Kilimanjaro International arrival with a Nairobi departure.

Cheapest flights
No one airfare site is always the cheapest in our experience, so we have listed a few that seem to have the best offers:
Each company will have a local internet site for your continent.
Baggage

Sometimes your baggage may be put on the wrong connection. When flying we recommend you wear your walking boots and carry a few essential items in a carry in bag so that this doesn't delay your trek start.

If your bags do not arrive with you, please report to your carrier inside the airport at the baggage claim desk, before passing through customs and fill out required paperwork. Ask them when they expect the bag to arrive and provide them with the phone number of the hotel you will be staying at.

Airport Codes

Airport code for major East African Airports are:

  • Kilimanjaro (JRO)

  • Arusha (ARK)

  • Dar es salaam (DAR)

  • Zanzibar (ZNZ)

  • Nairobi (NBO)

  • Entebbe (EBB)

Air Lines

The only major airline flying directly to Kilimanjaro International Airport is KLM from Europe and NORTHWEST AIRLINE from USA.Northwest Airline offers daily flights from major cities in U.S to Kilimanjaro International Airport. The daily flight from Amsterdam to Kilimanjaro International Airport (JRO) with KLM arrives in the late evening.

Alternative International Flights.

Kilimanjaro - Arusha area is the starting point for Tanzanian climbs and safaris. If a direct flight arriving at Kilimanjaro (JRO) on KLM/NORTHWEST AIRLINE is not possible, there are several good alternatives on:

  • British Airways.

  • Quatar Airways.

  • Swiss Airways.

  • Emirates.

  • Southafrican Airways.

Each of these airlines has arrival into Nairobi (Kenya) or Dar es salaam. Depending on your specific flight schedule an overnight maybe required either in Nairobi or Dar es salaam. If that happens we can also arrange hotels and transfers in both Dar Es Salaam Tanzania and Nairobi Kenya.

Address

Arusha,Tanzani

Enter You Email Below,To begin Your Unforgettable Trip To The Top Of Africa, Endless Serengeti Plains To The Paradise Beach at Zanzibar.

Get in touch